Name Printing! Ways to get started...with a FREE download!

One of the first things we encourage our students to do in our classroom is to write their name on their work (i.e. drawings, writing, paintings, etc.).  We teach them that their name is important and meaningful so that each student feels a sense of belonging.

In the new Ontario Kindergarten Program 2016, one of the four frames focuses on Belonging and Contributing.  We believe that making a child understand his/her sense of self begins with them identifying and being able to write his/her name and knowing how special and unique they are.

Here are a few ways we encourage name identification and printing the first few weeks of school.

Last year our Occupational Therapist recommended the program Handwriting Without Tears where these amazing wooden pieces are from.  We love how the children have used them to form the letters in their names.

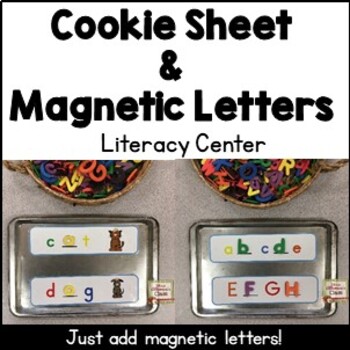
Sometimes it's as simple as leaving out letters (such as these rock letters) and inviting children to find what they need to spell their name - magnetic letters work great too!

We have written names on wooden paint sticks (which are FREE at your local hardware store!) and  letters on clothespins - students have to match letter-to-letter in their name. This activity is also a great way to strengthen fine motor muscles!

Exploring lines is a great way to practice pre-printing skills.  We leave these cards out along with their name cards for students to explore using Q-tips and water on chalkboards to form lines.
The cards are from Stimulating Learning with Rachel and you can find them here.

Students were so intrigued with how long/short their names are that they counted the letters and ordered them on our carpet.

Sometimes putting pressure on paper using a pencil is difficult so we love having students practice with a whiteboard marker.  We put these name sheets in plastic sleeves so that they can be wiped clean and used over and over.
We also cut them in half to form a booklets and send them home for extra practice.


You can download your own *editable* name printing pages (as seen in the photo above) by clicking here. They are made in Power Point.
Be sure to first download the free font "Print Dashed" which you can find here.
0

Our Learning Environment - The First Month

I can't believe that October is already here and the first month of school is over!
Where has the time gone?
Our students were welcomed into their learning environment, and although not much has changed from last year, we added a new area in our classroom for "small world play" and enlarged the block area on the carpet as many students are always interested in building.
The math centre is a favourite this year...we enjoy watching students explore the manipulatives on our math carpet.

Here is our small world play area.  The carpet is from Ikea and works perfectly to house all the creations happening here!
We offer an art shelf stocked with coloured paper, buttons, ribbon, and different materials (which we will change and add to over time).  Our students are still learning how to use just the right amount of glue!
The sand box has all of its materials on the nearby shelf, including large tree discs, rocks, jewels, and sticks.  The children are welcome to take materials from other areas of the classroom too!
At times, we add a sensory bin in our class - these past few weeks we have filled it with water, rocks, different lids, measuring cups and funnels to explore.  Other times, we bring it outside.
We have a Discovery/Science shelf with a nearby table.  The shelf holds items that we explored last year (which our Year 2 students will remember!) and we continuously add to it when students bring things in that are meaningful to them.
We started the year off by taking a closer look at various rocks that Mrs. Petrone and I collected over the past few months.  We were very excited to see the students interested in learning more about rocks!

Currently our Discovery Table is housing our pet snails that a student brought in from his backyard last week.

The Dramatic Play area starts off with a few basic materials - ceramic plates and glasses and real utensils.  We enjoy watching this area take the form of many different real-life places such as a grocery store, pizzeria, and doctor's office when the students feel like changing it.

And, of course, we have 3 "bistro" tables that we use for snack (which is self-regulated).
This year we added a small shelf nearby with items that we thought the children could use to be more independent.

We carefully leave out provocations that are simple yet meaningful for the beginning of the year. 
Here are just a few examples...
- exploring letters and names


Thank you to Darla Myers for inspiring this provocation!


- fine motor skills

- exploring art forms (dots and feelings)

- looking closely at flowers and plants and representing them through art pieces


Although the school year really has only gotten started, we have begun to document, in various ways, the learning taking place in our classroom.
You will see that we have a writing wall with co-constructed expectations of what writing should look like early on in the school year. As the year goes on, and we learn more about what writing is, we continue to add to this chart.  We have students share their work on a regular basis too!  It's a very important time in our classroom!


Both Mrs. Petrone and I were fortunate to attend the OECTA Kindergarten conference last week where we focused on the new curriculum and learning in the 4 frames.  After much thought, we came up with a new "Week-at-a-Glance" sheet that highlights the 4 frames and all of the learning that we have planned for the week.


You can download your editable copy by clicking here.
Be sure to download and save file on your computer.
(You will also need to download the Doodle Basic font which you can find here.)

Thanks for visiting!

1