Techy Teacher Tuesday...TpT banners the "cute" way!

 
I actually really look forward to Tuesday nights...good stuff on TV, house is still {somewhat} clean from the weekend, I don't have {much} to do for work and....Techy Teacher Tuesday with Katie King from Queen of the First Grade Jungle!
 
Since this isn't my first time contributing, you all know that I have to say that I am, by no means, a computer expert.  I am far, far, FAR from that...but I do like to learn and try new things.
 

Do you ever notice those banners sellers use to promote items on their TpT stores?
You know, the really cute ones that catch your eye and you wish you could figure out how to make one for your store?
They are posted right above the featured items.
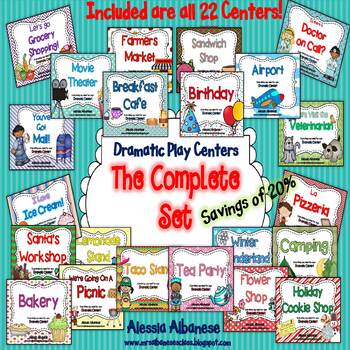
That happened to me a few months back....I thought it would be a great way to showcase some of my products that were seasonal or theme-based, and I wanted to make a new banner for each theme/month coming.
Where do you find this on TpT?
Click on Dashboard and you will see this area down to the right.  To make a banner you need to click on the paint brush.  Follow the instructions there on uploading your image and link.  That part is really easy.
 
I figured out how to make a banner, thanks to the help of my husband (I swear, he isn't a computer genious either, but he knows so much!  I'm getting there....slowly!).
There might be an easier way to make these, but here's how I ("not-so-computer-savvy" Alessia) made mine and thought I would share for other "not-so-computer-savvy" blogger friends out there who needs step-by-step instructions along with pictures.
 
First, I made a rectangular picture (doesn't really matter the size at this point) and saved my image as a JPG.
I blogged about how to do this last week (adding paper, images, text, etc.). 
You can read about that here in case you missed it.
(By the way - I like making these images in Power Point...nice and easy to use!)
 
 
You are going to have to make sure that picture isn't too big or small for your banner or else all you will see are cut off words (believe me, it's happened!).  Once you have your image saved, right click where you saved it and choose Open with, Microsoft Office Picture Manager. 


To make this image fit in the banner size on your TpT store, it has to be 706 px x 90 px (that's what TpT recommends).  You will need to change the size of your image by clicking on Picture, Resize.
 
On the right hand side you will see this box come up.  Simpy type in 706 and 90 in the "custom width and height" area and click OK.  When you close this, make sure to save it.
 
 
You are now ready to upload this image (and link to the product of your choice) on your TpT store.
 
 
I have made a few of these banners over the past few months.  Here's my little secret.  Make one in Power Point and save it.  Then, each time you want to create a new banner, use the old one and change the paper, fonts, images, whatever!  You will have to resave it as a JPG and do the above process over again but that's easy now!
 
Can't wait to see more stores jazzed up on TpT!  Hope this helps....and remember, I am NO computer expert (there is probably an easier, faster, simpler way....but this is my way and it works too!).


1

Let's learn about nutrition...and a giveaway!

This week our focus was on nutrition.
We actually talk about nutrition on a daily basis, as I'm sure most of you do.  The students are always excited to share what they have for snack or lunch (and make sure to tell me when they are eating a healthy item!).
 
We started the week by sorting plastic food into 2 groups: healthy and unhealthy.
(Sorry, forgot to take a pic!).
We talked about why some foods might fall under both....like cereal!
(I had one student say that he eats "junky" cereal only some mornings when his mom makes him! So funny!)
I then put out food cards that I made on my pocket chart for students to sort on their own.
 
We worked on these centres during our Literacy block.
 
Working on spelling CVC words - here's a little trick we do....hold up a finger for each sound you hear (I told them there are 3 sounds in each word here).
 
Since January, we have been focusing on the digraphs -th, -ch, and -sh.  These were easier for some students than others so it's definitely a skill we will keep working on! 
 
My littles are getting really good at reading a lot of sight words but I wanted to make sure they were able to spot the mistakes!  So in this activity, they are trying to unscramble the sight words (I had a chart nearby to check their answers.)
 
I can officially say that nearly all of my students have mastered their beginning sounds!  Yippee!  I loved it when my students showed me this activity today....I was so proud of all of them!
 
After talking about the Food Groups, we decided to plan a meal which would have foods not only from the food groups but also foods that were good for you (hence, no candy on the placemat for dinner!).
Then I had each student label their placemat.
 
You can find these activities and LOTS more in my *NEWLY REVISED (and doubled!)* Nutrition Literacy and Math Activities.
 
Coming up....Nutrition math centres and a fun pocket chart activity!
 
 
I would love it if you visited sweet friend, Tammy's, blog, Teaching FSL.
She is a French teacher also from nearby Toronto and is having an amazing giveaway! But hurry, the giveaway ends really soon!


4

Techy Teacher Tuesday: Let's Jazz Things Up!


I'm so excited for this week's Techy Teacher Tuesday post (thanks for hosting Katie King)!
I just learned how to do this (nicely) recently and wanted to share...jazz up your blog posts by including some cute pictures (along with clip art paper backgrounds, arrows, fonts, and your blog button, of course!).
 
So before I begin, I wanted to stress that I am NO WAY an expert at this, and I'm sure there is a simpler, faster way of doing this but this is how I do it, nice and easy to learn, so that's why I am sharing.  I am not the best at computers, but slowly I am learning more and more each day so hopefully I can help someone with this post (the rest of you computer experts out there, you can stop reading my post now! HA!)
 
 
Here's my example. 
I wanted to create a cute image that will grab my audience's attention to my newest Write the Room unit I just added to my Bundled Set.
I started with a paper clipart background and just added images and text from there.
 
I like to do all my things in Power Point so I'm going to show you how to do it this way - trust me....it's MUCH better than Word!
 
 
Start by inserting a paper clipart background (from your clipart file).
 
 
If the paper background doesn't fit nicely on your page you can enlarge it easily.
 
 
You can insert images on top of this paper, add text boxes and even your blog button.
I added arrows and circle shapes too.  Just click on Insert, Shapes and you will find those things there.  You can easily adjust the color and size by clicking on Format.
To add your blog button, make sure you right click your button image on your blog and save it.
Then insert the button as another image.
 
 
To save this whole thing as an image (your final one to post, yah!) here's a little trick.
Click Save As, Other Formats and click on JPG from the scroll list.  Name the image and it will be saved as JPG.  Now you can insert this *final* image into your blog posts!
 
Last step:  Want to add a link to that image that you just posted on your blog like mine?
This makes it easy for people to click on that image and take them to that product/site.
Click on the image you just inserted.  The Link button found on the toolbar at the top of your post will be highlighted.  To unhighlight it just click it.  Now click it again so that a box appears where you can inset the URL (website) that the image will take you to.
 
Sorry for the step-by-step details but I have said it before... I am a visual learner and write everything down.  Hope this helps those of you out there who are like me - if there are any!  I'm sure most of you already know how to do all of this so sorry for the ramblings!
 
Good luck with your future blog posts...can't wait to see what you create!  Leave me a comment and link if you do!

4

Updates galore!

Hi friends!
Hope everyone enjoyed the long weekend (I sure did!).
I took my little ones to the Royal Ontario Museum today...boy, did they have fun!
 
 
I updated my Nutrition Unit and added a whole bunch more fun activities , including ready-to-print centers in black and white AND colour as well as a pocket chart activity.
It is now DOUBLE it's original size (yes, I just couldn't stop creating for this unit, I love it so much!)
We will be starting Nutrition this week (look for more pics to come).  Click on the picture above to take you to the unit.
 
 
Some of you may remember a similar product I had posted last year...well we had to take down all things Dr. Seuss.  So I revamped that Write the Room and included new clipart (which is now acceptible, phew!).  If you bought this Write the Room pack last year, please do not buy this one (they are very similar - this one is a cute circus theme - not Dr. Seuss - but you could definitely use it for Read Across America Day coming up soon!). 
I will be adding it to my Write the Room Complete Set so be sure to re-download that later on this week if you already purchased it.


Finally, I have been busy working on a couple of new units by special request...Out of this World Literacy and Math Activities (all about space) and Happy St. Patrick's Day!
Be sure to check them out too!  Click on the pictures above.
 
Tomorrow night....Techy Tuesday (and I have had some e-mail requests for a few things to post about...now to get started on my pics!).


2

The Giving Tree

Okay, so Valentine's Day is over...now what?!
Well, we've moved on to starting our Nutrition Unit (coming up next week) and learning about Lent.
 
Here is a picture of our class Giving Tree.
 
 
We started talking about Lent this week by reading the story The Giving Tree by Shel Silverstein.
 
It's a wonderful story about a little boy and a tree who gives him so much.  Giving to the boy makes the tree happy so we talked about things we can do for others that will not only make them happy but us happy as well.
Then each student went home with a note outlining our project and a green piece of construction paper.  Every time they do a good deed at home (i.e. set the table, read to a sibling, etc.) they can make a leaf and we will place it on our tree.
It's only been a few days and already our tree is filing up!
 
This is a great activity to do with your littles during the Lenten season....instead of "giving something up" (like I gave up Coke...so far, so good!) the kinders are helping out.
 
 
We also learned that Lent lasts for 40 days and it is the time where we wait for Easter.
Each morning, we have been filing out this chart and counting down the 40 days.
I got this cute activity from my fabulous teaching partner from last year, Mrs. Angelucci.
 
Speaking of giving....
 
 
I got ANOTHER giant parcel in the mail the other day from my sweet friend Leigh Ann.
It was filled with lots and LOTS of Scentos markers (she knows how much I adore them and how hard it is to find all those scents in Canada!) and other goodies too!
 
 
If you haven't already checked out her blog, you should!  Leigh Ann is getting started in blogging and I'm sure she would love it if you popped by!  Click on the picture above.
 
My own 2 little ones at home dove into the markers instantly but I had to bring some to share with my other littles at school....so I used them today and worked with the kiddies who are still learning to print their name properly.  I'm telling you - everyone wanted to use these!
 
 
We have a 3 day weekend here in Toronto, too, yippee!  It's Family Day on Monday and I can't wait.  We don't have a lot planned but I don't mind sleeping in (usually 7:00 am is the latest - I have little ones at home!), hanging out in jammies and just relaxing together!
Bring on the weekend - and enjoy yours too!


6

Teacher Techy Tuesday: Reduce a JPG size


Oh my WORD!
I am back at it for the second week in a row....joining in with Katie King's 
linky party.
As I said last week, I have learned A LOT these past couple of months about technology. 
My latest piece of knowledge to share with you...

how to reduce a JPG's size!

There are lots of ways to do this....believe me, I think I was doing it the old fashioned (a.k.a. l-o-n-g way) before learning about this shortcut.

A JPG (for those of you who don't know) is a picture or image on your computer.  You can save images many ways but I usually save mine as JPGs.
Do you ever have the problem where you want to upload something (say, a thumbnail to TpT) and the picture/image is just too big?

Here is a quick and easy shortcut that will take you all of 5 seconds to save that image much smaller!
First, right click the picture you want to scale back in size.  Click "Open with" and choose "Microsoft Office Picture Manager".
You can see from the above image that my image is currently 116 KB but I am going to make that much smaller.

You are now working in Microsoft Office Picture Manager.  It will bring up the image you just chose to open.  Click on "Picture" on the toolbar and then click on "Compress Picture".

This sidebar will come up.  Make sure you click on "Documents" before clicking okay or enter.
You can see what the new size of the image will now be (look at the highlighted part in the image above).

Close - it will save automatically.

Ta-da!
You now have a smaller (and much more useful) image that you can use!

Hope that helps.  As I said, there are lots of ways of doing this but this was the quickest and easiest way for me.  
Remember....if I can do it, so can you!

Next week, how to make the cute images (like the ones I have inserted in this post), including backgrounds, blog buttons, images, arrows, shapes, etc.).  I know, I know...most of you probably already know how to do that!  Well, if there are any others out there that need step-by-step instructions (complete with pictures!) like I do, I'll be back to help you along the way!

3

Yum! Pancake Tuesday!

Tomorrow is Pancake Tuesday (or Shrove Tuesday) which is the day before Ash Wednesday, the start of Lent.  I work in a Catholic school and getting ready for Easter is a lot of fun!
So tomorrow we will be eating pancakes for morning snack.  Here's a cute activity we did today as we learned all about pancakes!

We read the book Pancakes! Pancakes! by Eric Carle and tried to remember all the steps the boy took so that he could finally eat his pancake!

Clip art by DJ Inkers

We read and acted out this poem (you can make up simple actions for it).
I have had this poem for YEARS (the author is Christina Rossetti) and it's always so much fun!

Click on the poem above to download your free poem to use tomorrow!


I had the students pair up and, using a beanbag as our "pancake", one friend tossed it into the air as the other friend tried to catch it (as we all said the poem out loud). 
They had so much fun!
(*Can you see the beanbag?  It's a little hard to tell in these pictures!)

If you like this poem, you can set it up on a pocket chart and have students rebuild it!
 You can download this activity for FREE by clicking on the picture below:
Hope you have a yummy day tomorrow!

5

Happy Valentine's Day + FREEBIE!

It's that time of year again....
Valentine's Day (or week, should I say?)
 
We seem to celebrate it all week long.  In fact, we have already been talking about Valentine's Day and working on themed centres.
(We had a HUGE snowstorm on Friday and I only had 6 students from my class along with 10 from the class across the hall so we couldn't have a "normal" work day - it sure was a fun day, though!)
 
Here's what we've been doing last week:
 
This is our pocket chart story along with the worksheet.
Isn't that handwriting incredible!  I am so proud of my kinders!
 
You Have Mail!
Working on beginning sounds - everyone wanted to do this centre - they couldn't get enough of opening up the envelopes and finding the picture inside on the letter!
 
One of the things we have been working on since we returned from Christmas break is numbers to 10.
At this centre, the students had to shake and spill 10 counters and record their answer.  I had them also circle which number was more.
This was a great way to show them the many ways we can make 10!
 
We had a special visitor the other week....Flat Stanley!
A sweet friend I met last year at the I Teach K! Conference, Beth, asked if her nephew would be able to send me his Flat Stanley to visit as part of his grade 2 project.
Of course!
I brought him to work a few days and the kids loved him!
Here he is helping us learn all about number 9.
 
And here is Flat Stanley playing the Find that Groundhog! game with us!
 
We had to say good-bye to Flat Stanley.  He leaving Canada tomorrow and venturing to Nashville, TN to spend some time with Greg from Kindergarten Smorgasboard.
Safe travels!
 
This is a picture of the card we made (it's the same as last year's card).  You can read all about that here.
 
Okay, here's a little freebie for you from my Valentine's Day Literacy and Math Activities unit.
We are going to be doing this tomorrow so I thought I would share in case you are looking for a few last minute things to do this week.
 
Students will be sorting the cards according to the number of syllables.
Click on the picture above to download this for free!
 
You can find more Valentine's Day activities in my fun unit!  Click on the picture to take check it out!
 
Wishing you a great week!  Stay tuned - more pics to follow from this fun week!


6